Cart
0
You may also like
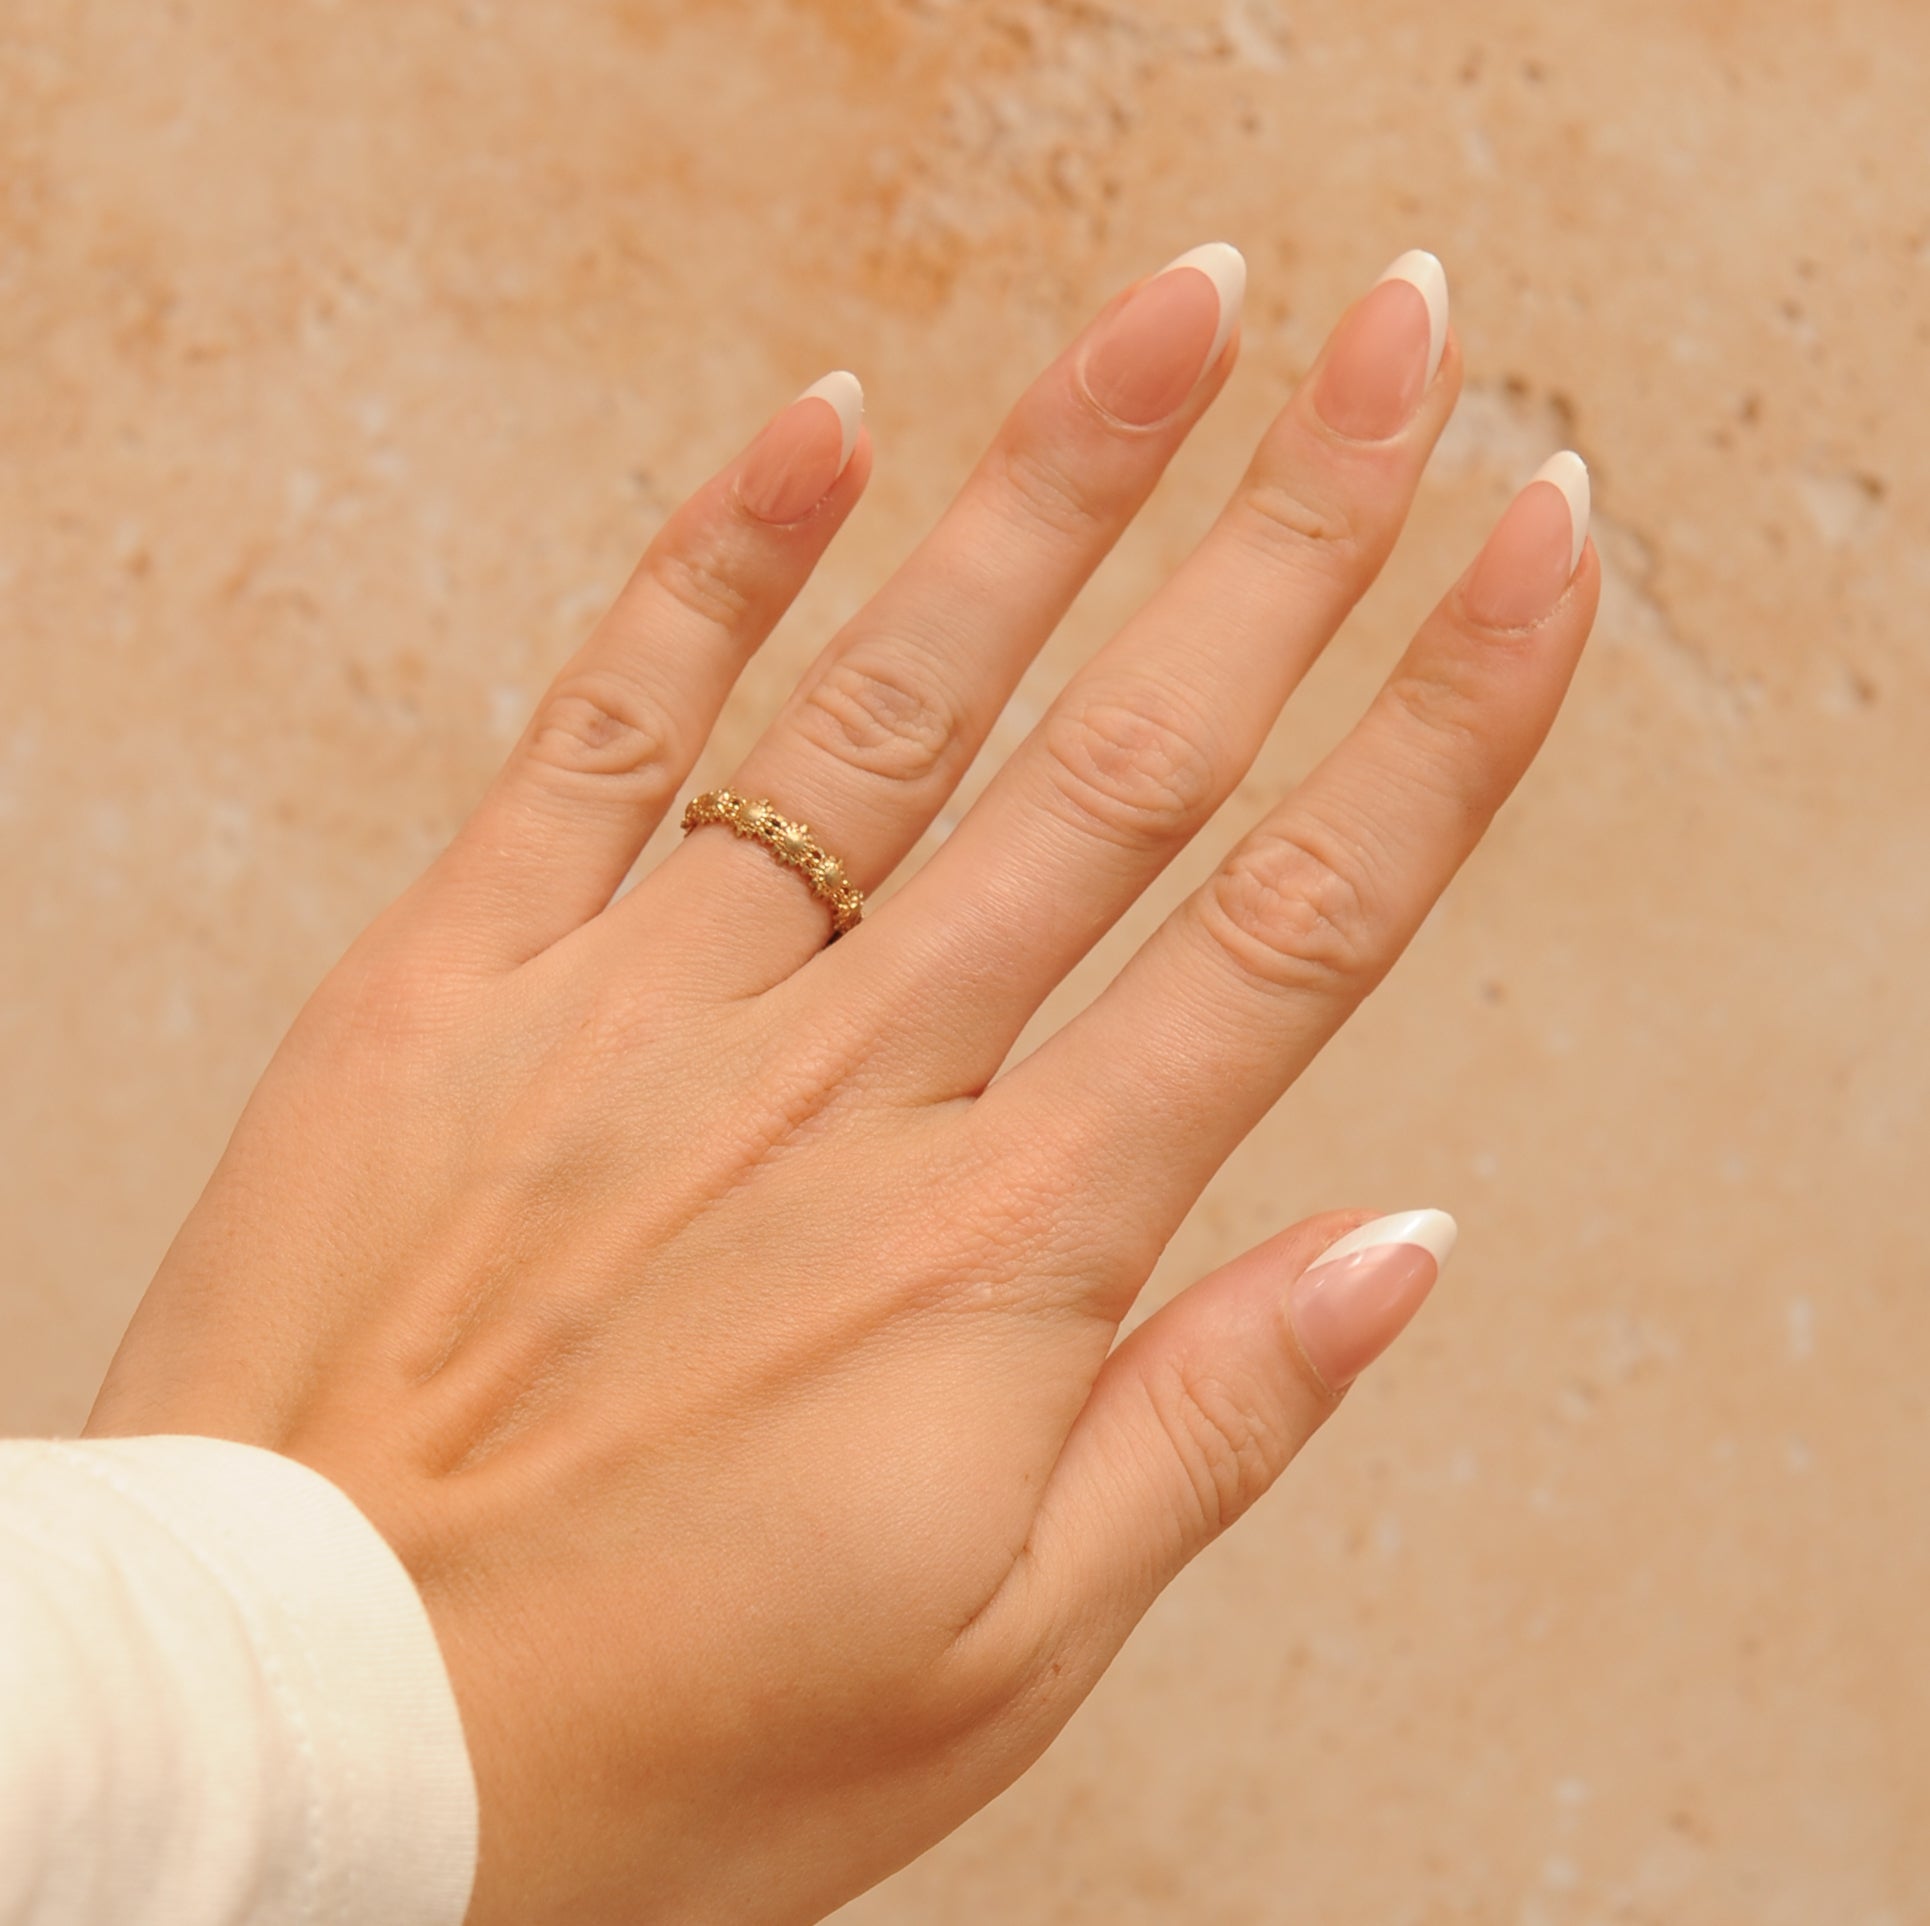


Discover how to apply, remove, and reuse your Opul Nails London press-ons.
Video tutorials
Thoroughly wash your hands, paying special attention to your nails. The goal is to remove any oils or residue to ensure you’re working on a clean, prepped nail surface.
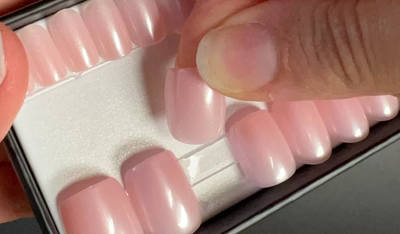
Select the tips that best match the size of each of your nails. Gently press the tip onto your natural nail to check that the sides align perfectly with the edges of your nail bed.
Thoroughly wash your hands, paying special attention to your nails. The goal is to remove any oils or residue to ensure you’re working on a clean, prepped nail surface.
Select the tips that best match the size of each of your nails. Gently press the tip onto your natural nail to check that the sides align perfectly with the edges of your nail bed.
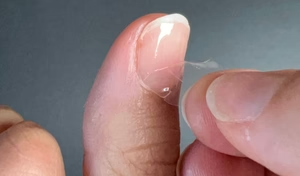
Using the flat end of the cuticle stick provided in your kit, gently push back your cuticles. The goal is to lift and move them away from the nail bed, especially if they’re slightly stuck to the nail surface.
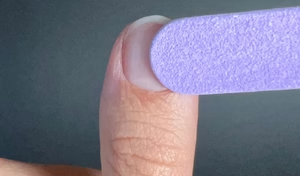
Using the mini nail file provided in your kit, gently buff the surface of your natural nails. The goal is to create a slightly rough texture to maximise adhesion.
Using the flat end of the cuticle stick provided in your kit, gently push back your cuticles. The goal is to lift and move them away from the nail bed, especially if they’re slightly stuck to the nail surface.
Using the mini nail file provided in your kit, gently buff the surface of your natural nails. The goal is to create a slightly rough texture to maximise adhesion.
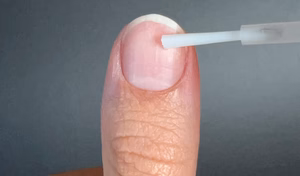
Wipe each nail with an alcohol-soaked cotton pad or Nail Prep solution (not included in the kit) to remove any remaining oils. The goal is to create a perfectly dry and clean surface to ensure maximum adhesion.
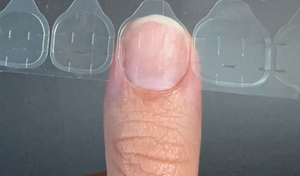
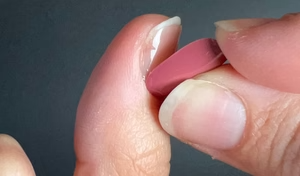
Select a Gel Pad that matches the size of your nail. The more the pad covers the width of your nail, the stronger and more secure the application will be.
Wipe each nail with an alcohol-soaked cotton pad or Nail Prep solution (not included in the kit) to remove any remaining oils. The goal is to create a perfectly dry and clean surface to ensure maximum adhesion.
Select a Gel Pad that matches the size of your nail. The more the pad covers the width of your nail, the stronger and more secure the application will be.
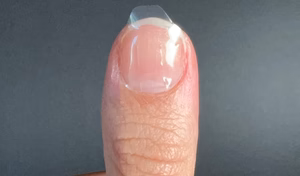
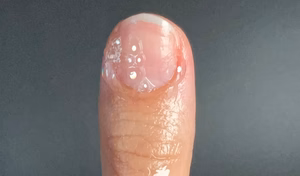
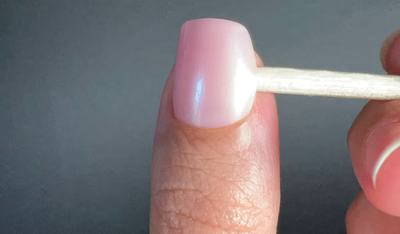
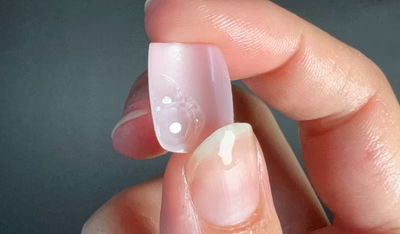
Peel off the Gel Pad using the tab, and place it onto your nail, leaving a 1mm gap from the cuticle. Start by pressing it down on one side of the nail, then smooth it across for a firm hold.
Gently press and massage the Gel Pad for a few seconds to help it adhere to your nail. Then, peel off the plastic film by pulling on the tab. If any part of the Gel Pad extends beyond your nail, gently trim or push it back before removing the tab.
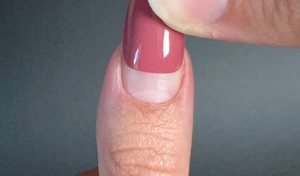
Place the tip just under your cuticle line, then press it down onto your nail slowly from the base upwards. Apply firm pressure to ensure it adheres smoothly and securely.

Firmly press and smooth the nail tip from top to bottom, massaging it into place to ensure full adhesion and eliminate any air bubbles.
Place the tip just under your cuticle line, then press it down onto your nail slowly from the base upwards. Apply firm pressure to ensure it adheres smoothly and securely.
Firmly press and smooth the nail tip from top to bottom, massaging it into place to ensure full adhesion and eliminate any air bubbles.
One of the main reasons press-ons lift prematurely is poor natural nail prep. Follow these tips to make sure your nails last beautifully:

Video tutorial
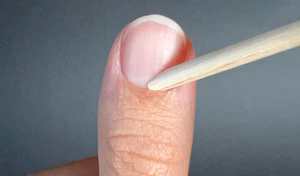
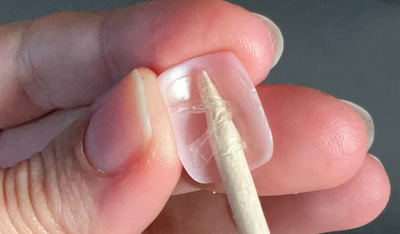
Gently slide the stick under the nail tip to lift the Gel Pad. Start from one side, then the other if needed. Be careful not to use a levering motion, as this could damage the tip.
To remove the Gel Pads from your nails and/or the tips, insert the pointed end of the stick into the Gel Pad, then twist while applying gentle pressure.
If the removed tips are dirty or greasy, wash them with soap and rinse thoroughly - be careful not to clog your sink! Then dry each one with a clean towel.
And that’s it - your press-ons are ready to be reused! Pop them back into their box for next time.
If the removed tips are dirty or greasy, wash them with soap and rinse thoroughly - be careful not to clog your sink! Then dry each one with a clean towel.
And that’s it - your press-ons are ready to be reused! Pop them back into their box for next time.

Customer Support 6 Days a Week
Our dedicated customer service team is here to help

No Stress
You have 30 days to change your mind

Vegan & Cruelty-Free
Beauty products that are kind to animals

